DIY Boxwood Wreath With Paper Flowers
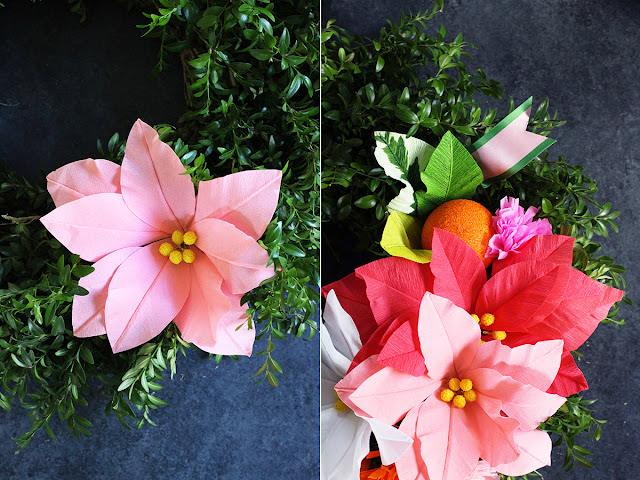
It all started with a boxwood wreath from Trader Joe’s. Honestly. I’ve always loved the hardiness and rich green hue of boxwood and for $10, I couldn’t possibly pass up one of TJ’s favorite holiday offerings. But how would I use the oh too simple wreath as a foundation for something bigger, brighter and more festive? Real flowers only last a few days but ah, paper flowers . . . paper flowers could easily outlast the boxwood itself and carry me through the holidays. So I paid a visit to paper flower genius Lynn Dolan and my friends at Castle In The Air for some brilliant ideas on how to embellish my new door decor. Lynn suggested poinsettias, a Christmas classic, in a Palm Springs inspired palette. Ding, ding! And what makes this tutorial even sweeter is that poinsettias “petals” are actually leaves (the tiny yellow buds in the center are the flowers!), which means there is really only one shape you’ll need to craft out of crepe paper to make this dream a reality. Easy, peasy. Just follow along and see . . .
Pom poms: These pom poms are super fast and easy to make – they almost look like little carnations! Take a 3 x 10? piece of fine crepe paper and accordion fold it into 2? sections.
Cut fringe into both ends of the paper.
Bunch the fringed strip together and wrap a 24 gauge green florist wire around the center and twist tight. Fold the fringed paper in half.
Wrap a thin strip of crepe paper around the base of the pom pom.
Now that all your poinsettias, leaves and pom poms are made, all you need to do now is to add everything to your wreath. Use the wire to secure the flowers and leaves around the base of the wreath. You can even glue some pieces of ribbon to the bottom of the flowers.
You’ll need:
- poinsettia crepe paper kit (includes crepe paper + flower centers to make poinsettias and leaves)
- floral wire (26 gauge white & 22 gauge brown for poinsettias, 24 gauge green for leaves)
- spun cotton fruit
- boxwood wreath (mine is $9.99 from Trader Joe’s)
- petal/leaf pattern (downloadable here)
- ribbon (optional)
- tacky glue
- scissors
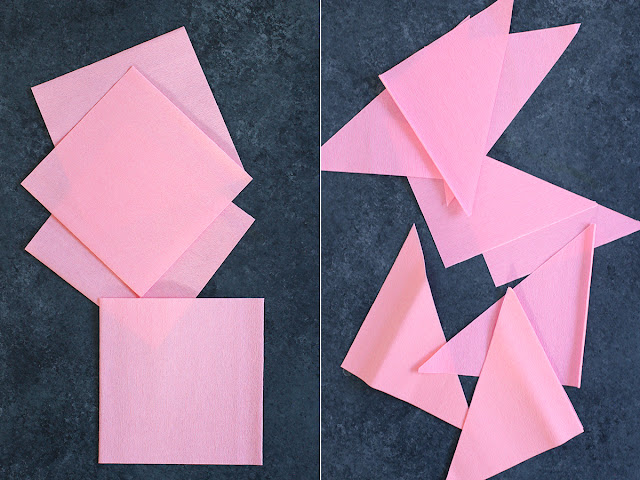
Poinsettias: Start by cutting the doublette crepe paper, included in the poinsettia kit, into 4.25? squares. Then cut them at a diagonal into triangles.
Align two triangles together to make a chevron pattern with the grain of the crepe paper. It should form a V pattern along the seam. Glue the two halves together.
If you look closely, you’ll see that you that the grain forms a downward chevron pattern along the seam. Use the pattern to cut out the poinsettia leaves.
Use a thin strip of scrap crepe paper, across the grain, to wrap around a piece of 26 gauge white floral wire. Dot the strip with glue and tightly wrap around the wire at a downward angle. You only need to cover about 6 inches of the wire.
Turn the leaves around and glue the wire along the back seam of each leaf. Each poinsettia consists of 4 small leaves and 5 large leaves.
Next, take a few little yellow spun cotton balls and cluster them around a piece of 22 gauge brown wire. Wrap them with glue and a strip of green florist crepe paper.
Start layering the small leaves around the yellow flowers. Wrap them together.
Then add the larger leaves and wrap at the base again.
Continue making poinsettias in various colors.
Leaves: The leaves will be made the same way as the poinsettia leaves. Cut the florist crepe paper, included in the poinsettia kit, into 4.25? squares. Cut them into triangles and align the grain of the paper together. Glue them together at the diagonal with tacky glue.
Allow to dry completely before opening it up and then cutting them into leaves using the patterns. Again, the grain should form a downward chevron pattern along the seam
Take the 24 gauge green florist wire and glue along the front side of the leaf. Trim the wire.
Now you can cluster a various leaves together, along with some pieces of fruit.Pom poms: These pom poms are super fast and easy to make – they almost look like little carnations! Take a 3 x 10? piece of fine crepe paper and accordion fold it into 2? sections.
Cut fringe into both ends of the paper.
Bunch the fringed strip together and wrap a 24 gauge green florist wire around the center and twist tight. Fold the fringed paper in half.
Wrap a thin strip of crepe paper around the base of the pom pom.
Now that all your poinsettias, leaves and pom poms are made, all you need to do now is to add everything to your wreath. Use the wire to secure the flowers and leaves around the base of the wreath. You can even glue some pieces of ribbon to the bottom of the flowers.
(tutorial curtesy of Lynn Dolan + Castle In The Air; images by HonestlyWTF)
source:honestlywtf.com by Erica in D.I.Y.


